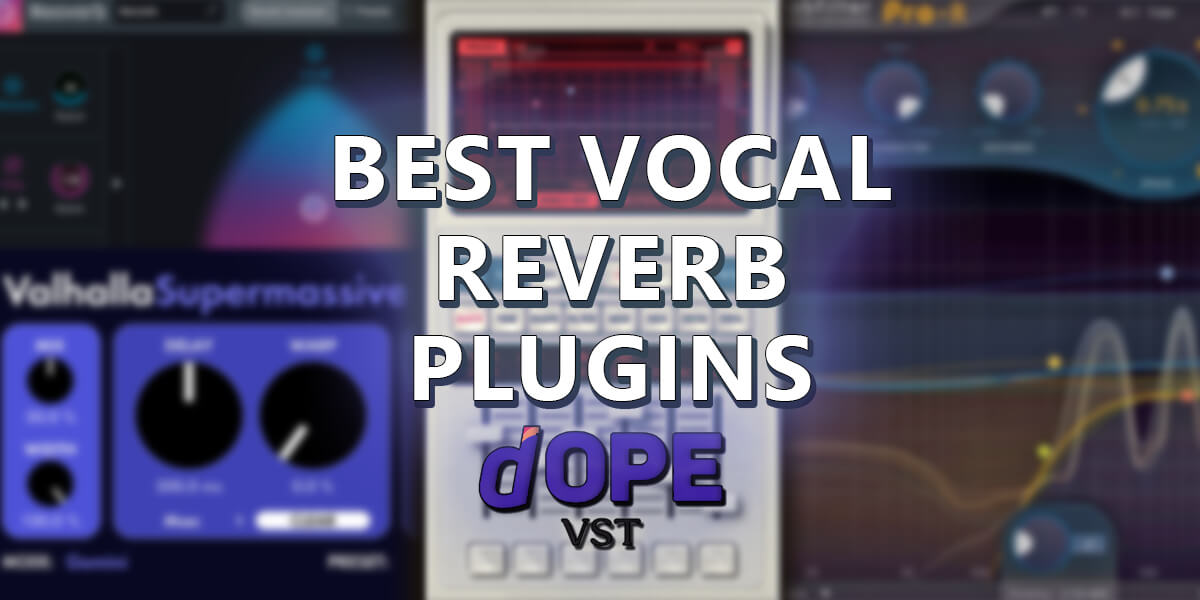
If you’re into music production, you probably know how important vocal reverb is. You can add depth and dimension to a vocalist’s sound with dedicated plugins. But with so many plugins available, it can be tough to pick the right one. Don’t worry, though. In this article, I’ll check out some of the best vocal reverb plugins to give your recordings that desired touch. So, let’s dive in!

How to use reverb on vocals

When mixing vocals, I recommend starting with arrangements to enrich them with reverb and convey the mood without making them fade away in the mix. So, here is how to use reverb for vocals:
- With a variety of instruments, you’ve got to set layers to create a deep surround soundscape. If you add pads, strings, or synths as a backing layer to the arrangements, giving them long halls, depth, and volume of cathedrals will make sense.
- In case of a sparse arrangement with only a few instruments, such as in modern trap music, feel free to create the farthest layer from your vocals.
- Keep the balance in mind — backing vocals sound further away from the listener compared to the lead vocals. Respectively, you can place them deeper in the mix, making their reverb on vocals more prominent.
- Consider the genre’s style. In music where live instruments dominate, do your best to reproduce the sound of real instruments played in a room. By immersing sounds in their “natural environment”, you can make your track more consistent.
- If your vocal recording has an echo of the room, do not hasten to add another room from the reverberation. Send vocal to an aux track with chorus effect and stereo imager. After this, mix it up to the lead vocal track in the ratio you like most. This will help you “blur” the overtones of the room, expand the vocals, and make them denser, avoiding noise in the mix.
I would like to point out that it is better to do all spatial processing on an aux track and then mix it in the right proportion. This will give you more flexible control and post-processing capabilities for the vocals reverb effect. For instance, applying an equalizer, compressor, or saturation.
Best reverbs for vocals reviews
Relab Development LX480 Complete – best overall
The LX480 Complete is a plugin designed after the well-known Lexicon 480L. Ralab managed to emulate hardware very accurately; moreover, it added plenty of cool features.
Keep reading my Relab LX480 Complete review to find out why many music producers, including me, consider this software the greatest reverb on today's market.
Main controls
At the top of the interface, there are four tabs that allow you to customize the reverb sound characteristics in a variety of ways. Let's take a closer look at these tabs.
The REVERB is responsible for volume and tail length (tail is late reflections).
You can give your sound a sense of depth, push it to the background, drown it in the mixing space, & color it beautifully with the help of the Hall or RHall (random hall) presets, and if you want to add the legendary Lexicon's air and sand, try Plate algorithms.
The EARLY/REF regulates the length and volume of the early reflections that represent a room. The more early reflections in your sound, the better you can hear room characteristics. If you want to add density to your instruments, such as drums or vocals, use modes with a predominance of short reflections - Ambiance and Room. The Lexicon 480 emulation shines at creating an "in your face" voice sense and bringing it to the forefront of the overall mix.
TIME/FREQ regulates the attenuation rate at various frequencies. Use it if you don't want low frequencies to take up too much space but wish to boost the instrument's high or mid-tones. So you can, for example, create a lovely sandy vocal top while keeping the energy spectrum of the voice closer to the listener. This is a popular trick in modern music for achieving a commercial sound.
FILTER/FREQ contains low pass and high pass filters to control bass and treble - a much-needed thing when balancing instruments in a mix. The default setting is 6 dB/octave, just like in the analog instrument. However, the Relab LX480 plugin may adjust the filter cutoff mode to 12/db per octave, which the hardware does not support.
Faders provide more detailed processing of these parameters at the plugin's bottom. The ability to modify the width of the stereo panorama with the WID parameter, which is accessible in the SHAPE tab, is one of the LX480's non-obvious features that distinguish it from the hardware. To be honest, not a single modern song can do without this technique.
In addition to the basic Ambiance, Room, Plate, Hall, and Random Hall algorithms, the manufacturer incorporated innovative features that allow you to push the device's capabilities to new heights. My favorite ones are TWIN DELAYS and PANORAMA.
TWIN DELAYS is a delay effect that greatly enhances your sound processing options.
PANORAMA uses psychoacoustic effects and is great for adding special effects to the mix and expanding instruments & vocals. This mode is definitely worth trying out!
And last but not least, you can add a chorus to any of the modes in the MOD tab.
How does It sound in the mix?

I'd like to bring your attention to the A and B buttons, commonly believed to be a switch for fast presets comparison. However, this is not the case with LX480 Complete VST. The manufacturer provides an A/B mode as a sequence of 2 reverbs working simultaneously. With the Setup button, you can select the most convenient algorithm for you. At first sight, this may seem complicated, but it is not. Now, I'll reveal one of the most important secrets of using such an algorithm in modern commercial music.
Mix engineers employ a smart yet simple approach to get the lead vocal to the foreground without drowning it out among other instruments. The vocal is placed in two spaces at the same time. The first space is a small room or ambiance with early reflections and no tails. When mixing this space in, the vocal becomes tight, vivid, and dynamic. The second space is the Plate or hall - it gives just a few early reflections, but there is a nice, soft tail.
To separate the tail, use the Predelay parameter, which may be set to 1/16 or even ⅛ from the project's tempo. You can easily adjust this value in milliseconds to suit your tempo. Next, remove unnecessary bass and treble with the High pass and Low pass filters. And the final step - shift the tail sound to the side by widening the panorama with the Width control. This way, the tight lead vocal will be right in front of the listener, sitting in the center and hitting with energy, but at the same time, it'll have a very deep and wide range.
I was impressed with the manufacturer's attention to detail. The LX480 includes RESONANCE RH - an inconspicuous button with an on/off switch that does a unique thing. Not many people know that when developing the analog Lexicon 480L, there was an error in the random hall algorithm. The plugin developers make it possible to fix this error using the switch to on mode. Just amazing!
Tech specifications
- Formats: AAX, AU, VST, VST3.
- Platform: Mac, Windows.
- System requirements – Mac: macOS 10.12 or later, Intel processor, 2GB RAM, only 64 bit.
- System requirements – Windows: Microsoft Windows 7 or later, Core 2 or higher, 2GB RAM, only 64 bit.
This is a reverb effect that the largest and most successful studios worldwide have been using for over thirty years. The sound it lets you create has long been an industry standard in the music of different epochs. So if you want your vocals to get a rich feel and to make them perfectly fit into the mix — this is the best reverb plugin for vocals you could possibly find.
Pros
- Completely replicates the sound of a hardware.
- Gives recognizable spatial color and depth found in many legendary songs.
- Beefed up with unique features you won’t find in analog equipment, allowing you to achieve a modern sound.
- You can mix the work of two spaces simultaneously in one reverb plugin.
Cons
- Envelope controls are not flexible enough.
FabFilter Pro-R – musical reverb
I've decided to write my FabFilter Pro-R review because I really enjoy this instrument and consider it one of the most musical digital reverbs available on today's market.
Fabfilter plugins are known for their surgically precise processing and flexible controls. However, when developing the Pro-R, engineers have perfectly combined the musical parameters that we can add or subtract and signal post-processing control. This gives just awesome results!
So, without further ado, let's take a closer look at this VST and what it offers.
Main controls

FabFilter Pro-R delivers an extensive set of controls that make it possible to create realistic and natural-sounding reverb for any instrument.
The Brightness control allows you to produce a brighter or darker reverb tail, making it easier to adjust the reverberation to suit different musical styles. The Character control can be used to add chorus-like modulation to the tail of the reverb, giving it more presence in the mix. The Distance regulator moves sound further away or closer to the listener by softening and blurring its late reflections, while the Decay Rate adjusts how quickly or slowly the reverb fades away. Next, the Space control changes not only the tail length but also the room's characteristics, which allows for a natural transition from little ambiance and rooms to larger spaces. However, I should note that the algorithm for switching to a specific space (e.g., Plate, Chamber, or Hall), which many people are used to, is absent here.
Another control I love is Stereo Width. It helps expand the sound and provides more space in the midrange for the foreground instruments, or on the contrary, narrows the sound to mono and pans it to your liking.
The Pro-R also features two EQ modules - Decay Rate EQ (Blue curve) and Parametric EQ (Yellow curve)- offering flexible equalization options. These EQs are modeled after the famous FabFilter Pro-Q 3 equalizer but don't include mid/side equalization capability.
Decay Rate EQ is a very flexible reverb tail curve. We increase the range of frequencies we want to fade longer and decrease the range we don't want to impact the mix. This allows us to estimate the spectrum we need, for example, for vocals. The Parametric EQ module enables further refinement of the output reverb signal. With this module, we can remove the low-frequency hum and a too bright top, creating a more natural yet deep space.
FabFilter Pro-R VST contains the Predelay function, which allows you to control not just the predelay size in milliseconds but also note length. When processing vocals, for example, this function is critical for separating a tail from the clean signal in order to avoid blurring the voice and losing it in the mix among other instruments.
And last but not least, there is a very useful MIDI learn feature. It allows you to assign plugin parameters to the MIDI controller's keys or regulators and generate unique automation effects.
How does It sound in the mix?

The non-standard controls allow us to focus on the sound because we listen to what we are doing. This has given me great results, especially on vocals, synthesizers, keyboards, and strings. I simply switched on the entire mix and, without thinking about the specific space, adjusted the musical reverb parameters until the vocal or instrument settled into the mix. Then I used the equalizer's flexible curves to fine-tune the sound to my liking. Following some practice, I realized that I don't spend hours searching for the right preset that imitates a particular space. I just move a few knobs, listen to what's going on, and get beautiful results.
One disadvantage of this reverb for me is that no matter how hard I tried, I could not create drum rooms akin to those in Addictive Drums or Steven Slate Drums. Overall, imitating small percussion rooms with FabFilter Pro-R is far from perfect. However, it's only my experience. You may do better and find the right preset for you.
In addition, I'd like to note that the plugin comes with a broad variety of presets that are organized thoughtfully based on the space size. For the most discerning audiophiles, there are also references to legendary instruments and software.
Tech specifications
- Formats: AAX, AU, VST, VST3.
- Platform: Mac, Windows.
- System requirements – Mac: macOS 10.13 or later, only 64 bit.
- System requirements – Windows: Microsoft Windows 7 or later, 32 or 64 bit.
Due to the musical controls, which are implemented in this VST reverb from the musical standpoint, you can achieve an interesting reverb sound, focusing on the final result. Pro-R is here to let you harmoniously fit the voice into the mix without going deeper into the characteristics of each specific space. It makes it one of the best reverbs for vocals and music.
Pros
- Flexible controls, especially the equalization block.
- There is a link to time signatures in the important Pre-Delay block, which significantly saves time in picking values.
- Linking reverb parameters to a MIDI controller using the midi learn function allows you to get striking automation effects.
Cons
- It may be hard to reproduce a natural sound created in smaller spaces such as live rooms.
- The equalizer block lacks the ability to perform mid/side equalization.
iZotope Neoverb – intelligence reverb
The iZotope company offers a reverb that literally listens to your material and helps select a perfect space for your mix. In my opinion, it is a very simple but, at the same time, unique instrument that allows you to achieve excellent results in a matter of minutes.
In my iZotope Neoverb review, I'll share some insight on this reverb and explain how it functions.
Main controls

Neoverb includes a plethora of controls for customizing its different reverb sizes. So, let's take a closer look at them all.
The plugin's Reverb Assistant is one of the most important components. If you want to fully grasp how it works, I'll describe the process step by step:
- Play the track to which you want to apply the reverb.
- Choose a reverb style - Realistic gives a space similar to the sound of small rooms, while Dramatic provides a deeper, more flying sound.
- Set the room size - from Extra Small to Extra Large. Then use the Dry/Wet knob to adjust the raw and processed signal ratio.
- Set the brightness of the reverb to your liking in the Tone menu. Four " colors " are available: Clean, Dark, Bright, and Airy.
- Once you have set all the parameters, click the Next button. The Assistant analyzes and processes the signal; Auto Cut cleans up the signal at the reverb's input (Pre EQ curve). Further, Unmask compares the dry & processed signal and, based on that, generates a curve in the Post EQ, de-masking the most important signal frequencies.
Thanks to iZotope Neoverb's flexible interface, you can quickly tweak the sound. In the center of the interface, there is a colored triangle. At its top, you'll find early reflections and very short tails, essential for creating the smallest spaces. In the lower-left corner, there are medium spaces, such as Room, Plate, and Medium Chamber. Larger spaces - Hall and Large Chamber - are in the lower right corner.
A huge advantage of this plugin is that you can mix different room types by moving the slider inside the triangle. This lets you discover the right sound for your instrument by ear and fine-tune it with the controls.
Almost all functions for each reverb type are the same; however, there are some differences, which we'll see below.
Space synchronously manages the Time and Size parameters, enabling you to specify the space size. While Size regulates the dimensions of the space, Time adjusts the tail timing for medium and large spaces or the number of tails for Reflections. Early reflections (as well as the Pre-Delay parameter) can be set to be bound to the note duration.
Diffusion is responsible for the density of reflections - the tighter they are, the better reverb is heard in the mix.
Attack determines how distinct the signal in the tail is - the lower the value, the clearer the signal. So if you want to blur the sound or make a background, just raise this value.
Angle (for Reflection) set at 0 leaves only early reflections. If you increase it, you'll mix in very short tails, making the sound denser and more sparkling.
Tone controls the position of the crossovers to determine where you want the reverb to be more noticeable.
Other features I love in iZotope Neoverb are Mod (modulation effect), Pre EQ, Reverb EQ, and the Smooth parameter. The modulation effect allows blending in reflections for more audible clarity in the mix. At the same time, the pre-EQ module provides equalization of the incoming signal before it passes through the reverb. The Reverb EQ module helps shape the reverb tone by controlling the frequency response of each output channel separately. Finally, the Smooth parameter adjusts the degree of "smoothness" of reflections (by default 100%), helping you achieve the right reverberation level for your mix.
Producers and engineers can easily craft clear and professional mixes with these powerful tools.
How does It sound in the mix?

The plugin is amazing for tonal instruments, especially vocals. Thanks to 3 room algorithms, which can work simultaneously, you’ll get really unique and fascinating audio, although the Plate algorithm sound seemed a bit artificial to me.
When it comes to percussion, I enjoy the reverb sound on snare and toms, particularly the one with long tails. Unfortunately, I didn't manage to put a live drum kit in the room nicely with iZotope Neoverb. However, I found an interesting application for this VST in tracks with electronic drums.
Tech specifications
- Formats: AAX, AU, VST, VST3.
- Platform: Mac, Windows.
- System requirements – Mac: macOS 10.13 or later, only 64 bit.
- System requirements – Windows: Microsoft Windows 10 or later, only 64 bit.
The iZotope Neoverb vocal reverb plugin offers a unique algorithm for reproducing the audio signal. It picks the optimal space based on the given preferences and sound character. I was delighted with how this plugin worked with vocals. In particular, I find its sound “unmasking” mode interesting. In a short amount of time, I was able to fit the vocals into the mix pretty well.
Pros
- You can use three reverb modes simultaneously, achieving striking results.
- Many controls are linked to musical dimensions, which speeds up the selection of room size and Pre-Delay values.
- When using iZotope Relay, you can analyze another track and, based on its frequencies, unmask the sound with the reverb plugin.
- Pre EQ — a unique yet very handy reverb feature is available.
- A convenient modulation control block.
Cons
- The sound of the Room and Plate algorithms is somewhat artificial, to my mind.
- Results with long tails and large spaces are more delightful than those with short reflections and small spaces.
Best free reverb plugin for vocal reviews
Valhalla Supermassive – for special effects
In this Valhalla Supermassive review, we'll discuss a budget-friendly yet comprehensive reverb & delay plugin created by the Valhalla DSP company.
When I first tried it, I thought it was just a basic Delay. Still, while experimenting with it, I realized that this VST is quite versatile and can be used to generate a wide variety of intriguing effects, modulation, and deep spaces for musical expression. I frequently use Supermassive to produce interesting textures in sound design and create the farthest shots of the instrument and vocals.
Main controls

Valhalla Supermassive features a range of intuitive controls for creating unique soundscapes. Let's take a closer look at them:
The MIX control allows you to adjust the dry/wet signal ratio between the original signal and the delayed one, supporting more flexible mixing options. The WIDTH determines how wide the stereo panorama should be, plus, it can invert it or turn it into a mono signal. The DELAY helps set the delay time in either milliseconds or notes. The WARP provides a great deal of versatility when it comes to creating interesting textures as it changes the duration of the delay's early reflections - the higher the value, the more delay goes into reverb. Next, the FEEDBACK determines the length of each delay tail, while the DENSITY adds saturation across the panorama creating a more distorted yet audible sound in the mix. The MOD further adds width and clarity to early reflections by adding a chorus effect, whereas the EQ's low pass and high pass filter sections let you tailor the effect to your liking.
One of the finest Valhalla Supermassive VST's control features is MODE; it literally creates magic. Below I'll highlight my favorites (to hear all their beauty, turn the warp knob).
Hydra has double echoes with long decay. As a stereo delay, it's ideal for increasing an instrument's or vocal's width.
Sagittarius creates exciting pulsating textures thanks to slow attack and long reverb. It's a great special effect for electronic music if you apply a side chain from the kick.
Large Magellanic Cloud generates very long repetitions and a light rhythmic pulsation due to the medium attack. At high values of Density and Warp, this mode allows you to create literally clouds of sounds - a cool feature for the furthest vocal or pad layouts.
Cirrus Minor & Cirrus Major produce a fascinating delay effect with a great predelay, creating the mood you want. I love to listen to it in sparse, slow settings. Highly recommended, especially for vocals!
Scorpio brings a very interesting repetition thanks to randomized echo density and filtered decay. I often use this mode in sound design.
How does It sound in the mix?

I have to admit that I've never used Supermassive as a simple delay because this task has much more effective solutions. But on the other hand, it's one of my favorite plugins for creating unique textures, sound design elements, and deep background vocals. As a result, I often use it in mixes with rarefied arrangements and unusual, deep textures.
Tech specifications
- Formats: AAX, AU, VST, VST3.
- Platform: Mac, Windows.
- System requirements – Mac: macOS 10.12 or later, only 64 bit.
- System requirements – Windows: Microsoft Windows 7 or later, only 64 bit.
Although technically, this is a delay plugin, I still think that it is a great VST for creating deep textures and soundscapes. I use it to create deep, distant layers for vocals. Also, it does a great job with backing vocals and ad-libs in modern hip-hop music. I recommend trying it in slow melodic songs — that’s where it proved to be the best reverb settings for vocals. And, most importantly, it’s absolutely free of charge.
Pros
- An interesting implementation of the developer’s view on the capabilities of the delay effect.
- Allows creating your own signature sound.
- Works great for creative effects and sound design.
- Perfectly conveys deep spaces.
Cons
- You will need to invest some time in getting familiar with numerous algorithms.
- Some algorithms seem to be alike.
- May not be an optimal choice if you look for common delay effects.
Reverb settings for vocals

Each vocal and song requires unique settings. I’ll guide you through the general principles of vocal reverb and help you find the best reverb settings for vocals in your mixes. To create dense surround sound, you’ve got to use several plugins with different settings:
- Room or Ambiance – a room where early reflections dominate. It also has very short tales and a relatively small Pre-Delay value (start with a 1/64 or 1/32 note). The sound is close to the listener and doesn’t scatter. Equalize to make the low-mids dominate while ensuring the upper range is practically absent in the reverb.
- Plate or Hall – here, we’ve got to get a few early reflections and a long tail. It’s approximately 1.5-4 seconds. The Pre-Delay time is also fairly long, around 80-100 milliseconds or 1/16 or 1/8 note. Equalize to emphasize the mid and upper midrange, while the lows and highs should be very soft.
- Black Hall, Cathedral, Shimmer – set a minimal amount of early reflections and a very long tail. You can start with 5 seconds or longer. The Pre-Delay value is zero. During equalization, you’ve got to remove all the low and high frequencies, leaving a deep, distant sound.
- Mod (Chorus) – Set the reverb to modulation mode; this will create a chorus effect with the added capability to make it denser by adding short reflections. You can remove the low frequencies to loosen the side in the mix.
Once you have set up all the necessary tools, unleash your creativity and apply these tools to your vocals. Here is how to use reverb on vocals:
- To lead vocals, I mix in a more short room to make it denser, and if the arrangement allows it, plate or hall.
- To double tracks, I add a chorus effect that expands and intensifies doubles, and in some situations, I may add a little room.
- To back vocals, I mostly put plate or hall, and in some places in the mix, I can automate the large spaces’ presence.
- To vocal fx, ad-libs, single words, etc. – everything that rarely occurs in the arrangement and does not take up much space, I put it at the furthest layer of deep space.